Asteroid Fields
Blitz3D Forums/Blitz3D Programming/Asteroid Fields
| ||
| I wonder how to create an asteroid field like in the game Freelancer. Watch this video to see what I mean. I would like to create - an asteroid belt like in our solar system (like a torus) - ice rings around planets (like a flat disc around saturn, look at this video) - local asteroid/debris clouds (like a distorted sphere) - and the asteroids should be solid, moving, turning Looks easy with only a few objects but isn't with thousands and very large fields. How would you realise this? Suggestions from easy to complex are welcome... A perfect demo of planetary rings is this video from the Infinity Project. |
| ||
| I really want to play the infinity project, it seems like it's taking forever to come out!!!! Maybe frontier should buy the engine and use it to release elite 4 |
| ||
| As long as the title doesn't mean we have to wait infinite for the release? ;-) |
| ||
| Maybe you could use a SceneGraph-like structure to hide/show objects in your scene, and use LOD. I would look into a combination of sprites and meshes to create the scene. For instance to create a ring around a planet. You could use a big sprite to create it's far-away view, and use meshes to create the single asteroids when getting closer. |
| ||
| You'd have to use a single surface system for far away objects using either very low poly versions of the model or billboards, low LOD poly model for the individual astroids at a medium distance and high poly model for close up. For belts/rings I'd probably use an image where each pixel value is a seed for a predetermined debris pattern and build that pattern when close and display the belt texture from a distance. |
| ||
I'd make a mesh that's hidden from view. Then, I'd iterate through a loop along the lines of this:For i = 0 To NumberOfAsteroidsPerTriangle-1 For s = 0 To CountSurfaces(AsteroidPlacementMesh)-1 surf = GetSurface(AsteroidPlacementMesh,s) For tri = 0 To CountTriangles(surf)-1 Create asteroid here and set To autofade Position asteroid at random position on triangle Next Next NextFor the positioning of the asteroids I would use trilinear interpolation. First I would find a point at a random position between the triangle's first and second vertex. Then, I'd find a random position between that position and the third vertex. Also, I would probably move the asteroids randomly a little along the triangle's normal so it doesn't look like they're all sitting on a flat surface. For the creation of the asteroids, I'd just create a sphere and move each of its vertices by a small, random amount towards or away from the center of the sphere to make it look lumpy and irregular. Then, give them random scales. Also, I might delete asteroids that are colliding with each other, just to be safe. The autofading would prevent too many polygons due to the asteroids. You also might create a model of the surface from far away to keep the asteroids consistent. I hope this helps! |
| ||
| Hmm for better understanding I'll post my procedural testbed, perhaps somebody can add some basic code to it that my project gets a little bit "enlightened". I'm really stuck here. The suggestion with the scenegraph makes sense, but the ring contains millions to billions of debris, how must I design the system that only a few (ex. 1000) local debris gets spawned when you enter the rings and continue spawning while flying through the rings? I think this can only be done by procedural noise but I absolutely don't know how to start... The ring system is a single mesh with a 1 pixel wide noise texture applied to it using UV coordinates from center to outside, very simple but looks really cool. I tried to polish it with procedural detail textures but it is hard to apply these to the circular ring structure, perhaps with a second UV set or a new surface, but this has priority 999 by now. Now here is my simple procedural Saturn planet, if you want you can add my Milkyway Panorama like in the screenshot (see signature) and uncomment the line before the main loop - but the code runs without any external media. Movement with mouse/arrows, SHIFT=10x speed, SPACE=Wireframe, 1-3 = show/hide special FX.  |
| ||
| Unless you want fully procedural, (meaning everything is created first and stays that way) you could try that method that a few of those Blitz "outdoor grass demos" floating around use. As you move, new asteroids are created on the fly around the camera, and ones gone out of range are deleted. You could still use autofade to hide their sudden disappearance/creation. I'd like to look into this code more and see if I could come up with a solution. I've had the same problem trying to figure out how to "en-grass" an entire huge landscape efficiently and realistically. EDIT: OK. Try putting this after the "planetary ring" creation code: ;Asteroid Field Global asteroidcollection = CreatePivot(PLANET) For d# = 0 To 360 Local asteroids = CreateMesh(asteroidcollection) Local dist# = Rnd(1.75,2.7) PositionEntity asteroids,Cos(d)*dist,Rnd(-0.1,0.1),Sin(d)*dist EntityAutoFade asteroids,0,1 For i = 0 To 160 Local asteroid = CreateSphere(4) Local asteroid_scale# = Rnd(0.00001,0.0015) ;For s = 1 To CountSurfaces(asteroid) ; surf% = GetSurface(asteroid,s) ; For v = 0 To CountVertices(surf)-1 ; VertexCoords surf,v,VertexX(surf,v)+Rnd(-0.5,0.5),VertexY(surf,v)+Rnd(-0.5,0.5),VertexZ(surf,v)+Rnd(-0.5,0.5) ; Next ;Next ScaleMesh asteroid,asteroid_scale,asteroid_scale,asteroid_scale PositionMesh asteroid,Rnd(-0.3,0.3),Rnd(-0.025,0.025),Rnd(-0.3,0.3) AddMesh asteroid,asteroids FreeEntity asteroid Next Next Personally, I think it looks pretty good, but the asteroids are still just spheres, and I don't know how I would go about the movement other than just rotating them around the planet. I did try to make the spheres look more like asteroids, but for some reason, it caused the top and bottom of the spheres to disconnect. If you want to see my attempt at making them look like asteroids, uncomment the part in the middle. You could make a couple asteroid models, then each time an asteroid is created, just choose one of them randomly. EDIT 2: I don't know why, but your program keeps making the camera's position become NaN. I ran into this several times when I was designing a FPS, and I didn't know what to do about it. Also, you can add this code to your main loop to move the asteroids around the planet: TurnEntity asteroidcollection,0,0.001,0 EDIT 3 (so many edits!): I think the NaN problem may have something to do with the fact that you're controlling the camera directly and using MoveEntity, instead of parenting it to a pivot, then moving that. The other game I had problems with didn't use a pivot either. It also might have to do with the scale of your project, I mean, the planet is only 1 Blitz unit in radius! |
| ||
| I'm not able to run b3d now, but I thought I post a link to my archive entry on scenegraphs. Hopefully it helps a bit: http://www.blitzmax.com/codearcs/codearcs.php?code=2650 [edit]The scenegraph should not be filled with single objects, but with merged groups of objects. Also, I was thinking about ROAM terrains, but nothing concrete came up. ROAM in short is used to create LOD on terrains. You recursively divide the space into squares. (2 tris) For each new square (or tri) that is created, you check the distance towards the camera. Depending on the distance and the size of the square, it is subdivided again. Big squares that are far away are not subdivided. The closer a square (or tri) is, the further it is subdivided. That results in this kind of structure: -http://www.riemers.net/images/XNA_ROAM.jpg Around the camera, there is much detail, and far away, there is less detail. |
| ||
| I guess you could make two sets of asteroids - one containing large asteroids, and one containing small ones and set the smaller asteroids to have a closer autofade distance. |
| ||
| WOW ClayPigeon, this looks really cool and is simple, too. There is only one problem - the density is too low while the RAM consumption too high. I think it would be much better to create and spawn the asteroid blocks in runtime only if the cam is nearby and delete them if they are at a certain distance. I have to investigate this further and take a closer look at Warner's scene graph (which creates all meshes first, too, but I need to check this out). |
| ||
| Maybe you could make separate asteroid cluster models and load them into memory and hide them. Then, you could just CopyEntity them whenever you need them. If you're worried about RAM, you could make the separate asteroid block meshes take up more space, then make less asteroid blocks. AFAIK all meshes are stored in VRAM. |
| ||
| Krischan Wow! That is one of the most beautiful scenes I've ever seen requiring no external media! |
| ||
| That with the inclusion of the astroid code is a kick ass sample |
| ||
| Oh by the way, @ClayPigeon: Regarding how to make the asteroids look more like asteroids - I'm 90% certain it was Rob Farley made some very quick, but effective code for me that does this. I doubt it's as artistically great as the aboe, but it's a start for procedural asteroids after all. Perhaps making the texture generated with perlin noise too?
Graphics3D 640,480,32,2
SetBuffer BackBuffer()

light=CreateLight(1)
MoveEntity light,400,150,-60

Global camera
Dim vpos#(1,1)

camera=CreateCamera()
CameraViewport camera,0,0,640,480
MoveEntity camera,0,23,0

CameraRange camera,1,5000
CameraFogMode camera,0
CameraFogColor camera,210,200,150
CameraFogRange camera,200,1000
AmbientLight 35,38,40

CameraClsMode camera,True,True

ClearTextureFilters

MoveMouse GraphicsWidth()/2,GraphicsHeight()/2
.run

Global sphere=CreateSphere(Rand(8,32))
PointEntity camera,sphere
tex=CreateTexture(256,256)

SetBuffer TextureBuffer(tex)

ClsColor 128,128,128
Cls
If (MilliSecs() Mod 2)
	For f=0 To 256
		For g=0 To 256
				col=Rand(64,192)
			Color col,col+8,col-8
			Plot f,g
		Next
	Next
Else
	For f=0 To 256
		For g=0 To 256
			col=Rand(32,128)
			Color col+32,col,col-32
			Plot f,g
		Next
	Next
End If

For f=1 To 640
	sz#=Rnd(4,12)
	sx=Rand(-128,256)
	sy=Rand(-128,256)
	col=ColorRed()
	Color col,col,col-32
	Oval sx,sy,sz,sz,0
	col=col-4
	Color col,col,col-32
	Oval sx-4,sy,sz-4,sz-4,0

	sz#=Rnd(4,12)
	sx=Rand(-128,256)
	sy=Rand(-128,256)

	col=Rand(32,128)
	Color col+32,col,col-32
	Oval sx,sy,sz,sz,0
	col=col-4
	Color col,col,col-24
	Oval sx-4,sy,sz-4,sz-4,0

Next

SetBuffer BackBuffer()

EntityTexture sphere,tex
size#=Rnd(2.0,10.0)
sz#=Rnd(size#,size#*1.5)
ScaleEntity sphere,size#*0.75,sz,size#*0.75
Morph(Sphere)


While Not MouseDown(1)
TurnEntity sphere,0.1,0.1,0.1
RenderWorld
Flip
Wend

FreeEntity sphere
FreeTexture tex
Goto run

End

Function Morph(mesh)

Cls
Flip

  surftotal=CountSurfaces(mesh)

  For xx= 1 To surftotal
    as1=GetSurface(mesh,xx)

    ; record the locations of the verts
    Dim vpos#(CountVertices(as1)-1,3)

    For n=0 To CountVertices(as1)-1

      vpos(n,0)=VertexX(as1,n)
      vpos#(n,1)=VertexY(as1,n)
      vpos#(n,2)=VertexZ(as1,n)
      vpos#(n,3)=0
    Next

    For n=0 To CountVertices(as1)-1 Step 2

      ; change these to make it more or less messy
      xm#=Rnd(-.05,.05)
      ym#=Rnd(-.05,.05)
      zm#=Rnd(-.05,.05)

      For nn=0 To CountVertices(as1)-1

        ; if the vert has not been monkeyed with monkey away
        If vpos(nn,3)=0
          If vpos(n,0)=vpos(nn,0) And vpos(n,1)=vpos(nn,1) And vpos(n,2)=vpos(nn,2)
            VertexCoords as1,nn,vpos(nn,0)+xm,vpos(nn,1)+ym,vpos(nn,2)+zm
            vpos(nn,3)=1
          EndIf
        EndIf

      Next


    Next


  Next

  Return mesh

End Function |
| ||
| Hey, Malice! That looks neat! It also gave me an idea. What if the asteroids were generated using 3D array, and create a model using the marching cubes algorithm? That sure would look neat if the generation was made just right. It could have holes through it and stuff! |
| ||
| Yeah, the above is very simple really at the heart of it, basically, just a sphere with the vertices slightly defpormed randomly, then the whole thing is scaled to make it slightly oblate if not almost spherical. The texturing is a bit messy but that ccan be completely removed in favour of something more workable (the perlin thing till sounds good to me :) ) As for the idea of giving the asteroids some kind of array, it should be possible to determine the actyual deformations dfone on the verts instead of simply random alterations as they are currently. A lot could potentially be done with it, just by substituting in some home-made functions, as it stands, it's just the bare boners really just been dressed over quickly to show that it works. (In my own use of the code, I actually worked with a random Seed value that allowed the asteroid belt to be created the same in the right places, with a different one elsewhere. This also ensured a dispersal of the asteroids and such. |
| ||
| the perlin thing till sounds good to me :) lol, I never said it was bad. In fact, it might be able to be implemented into the marching cube array idea using 3-dimensional perlin noise. To make the asteroids less spherical, you could do several deformation passes. On the first iteration, a single vertex is moved a random amount. Then each of its neighboring vertices will be moved by the same amount, but dampened by their distance from the original vertex. This, in turn, will move large lumps instead of single vertices. As you iterate through the deformations, decrease the range of vertices moved with the selected one, until you're only moving one vertex. This ought to make a neat lumpy-effect while maintaining the fine surface bumps. p.s. That's a neat way of generating a rocky texture! Just Ovals and colored noise! |
| ||
| been playing with this lol... possibly to do some quite awe inspiring effects with simple tweaks... |
| ||
| Here's my attempt: It's not perfect; it gets these little sticky-outy vertices in the center of each deformation, but you get the idea. |
| ||
| p.s. That's a neat way of generating a rocky texture! Just Ovals and colored noise! Heh yeah it began as an attempt to mimic craters but the resolution isnt too good for that, but it gave a nice enough effect to break up the random noise 'plain-ness' that I left it in :) --------------------- As for your code, I like the effect given to the overall shape, I agree the little spikes could do with flattening, Not sure how they get in there yet. One thing, though, which is certainly true from my code too, that for asteroids (understandably due to the almost spherical shape) these things take an awful lot of tris. Not a problem for just one displayed in the example, but when there's a whole asteroid belt of them, combined with a high-poly planet sphere (plus the 'glow mesh and ring too) I can see the poly count rocketing. So I added David Bird's polygon reducing code (Press Z to reduce). I'm hoping to use the Delauney Triangulation code (Now that I know how it can be used!) to then re-increase the polycount again.. should be done in a day or two I hope :) ' The clipping ussues with the 'spikey' triangles that poke out from the surface seems to get worse with this though, as large 'cracks' apperar in the mesh :( Hopefully I might find out what causes the spikes though :) |
| ||
| Freelancer done asteroids by having 'clumps of asteroids' at extreme distance (as long as it was still in the field location), then smaller clumps nearer to the player then when it got to a certain distance the asteroids were created. If you look at ALL videos of FreeLancer you will notice some fade at certain distances, for the asteroid fields they are placed within a certain distance from asteroid x, y, z. The Nebulae were created in the same way. |
| ||
| I did a lot of asteroid work a couple of years ago; I found that Blitz's CreateSphere() is actually a rectangle of vertices wrapped around the sphere. This gives it two weird features that become apparent when you deform it. First, it has a seam that will separate and create a rift if you don't carefully match the two vertices at each point along the seam. Second, each pole is actually a collection of vertices; one for each column. So again, you have to first "collect" all the north pole verts and adjust them all the same exact way, or you will have a flowery looking crack. South pole too. All of this is needed for texturing. I ended up writing CreateSphere2() which has no seams for my asteroids: Function createsphere2(segments) sa#=180.0/segments ; sa=segment angle. This is for both latitude and longitude (equatorial angle) newsphere2=CreateMesh() surface=CreateSurface(newsphere2) ; *** Add the vertexes *** AddVertex(surface,0,1,0) ; North pole For latitude=1 To segments-1 y#=Cos(sa*latitude) ; This is the y value for all vertices in this latitude lateraldistancefromaxis#=Sin(sa*latitude) ; This is needed for next calculations For longitude = 1 To segments*2 x#=Cos(sa*longitude)*lateraldistancefromaxis z#=Sin(sa*longitude)*lateraldistancefromaxis AddVertex(surface,x,y,z) Next Next AddVertex(surface,0,-1,0) ; South pole ; *** Add the triangles *** ; First the north pole triangles For vertex=2 To segments*2 AddTriangle(surface,vertex-1,0,vertex) Next AddTriangle(surface,segments*2,0,1) ; Now everything but the poles For latitude=1 To segments-2 For vertex=(latitude-1)*segments*2+1 To latitude*segments*2-1 AddTriangle(surface,vertex+1,vertex+segments*2,vertex) AddTriangle(surface,vertex+1,vertex+segments*2+1,vertex+segments*2) Next vertex=(latitude-1)*segments*2+1 AddTriangle(surface,vertex,vertex+segments*2,vertex+segments*4-1) AddTriangle(surface,vertex,vertex+segments*4-1,vertex+(segments*2-1)) Next ; Lastly the south pole triangles lastvertex=(segments*2)*(segments-1)+1 ; +2 would be the total number of vertices, +1 is the index of the last vertex (south pole) For vertex=lastvertex-1 To lastvertex-segments*2+1 Step -1 AddTriangle(surface,vertex,lastvertex,vertex-1) Next AddTriangle(surface,lastvertex-segments*2,lastvertex,lastvertex-1) ;sphere=CreateSphere(segments) EntityColor(newsphere2,255,255,255);255,255) UpdateNormals(newsphere2) Return newsphere2 End Function |
| ||
| That's really great to know, Axel, thanks - maybe you should post that in the code archives? I did find, that using the Sphere2 removed all those 'cracks' and clipping issues, but unfortunately, I also found I couldn't apply a texture to the Mesh... Maybe somehting to do with the EntityFX or such I've used though... Oh, lastly, I noticed in ClayPidgeon's code, this line: If mult > 0 mult always seems to be >0 so I dabgbled around and found this seems to give some great results when taken as a ratio of "jaggedness" of the surface. so just making the line If (mult=1) Makes some very jagged asteroids but the tris dont look too 'pointed' which is nice. You can try yourself with If (Mult>0.5) and (mult<0.8) or such for interesting results to maybe strike a good balance! |
| ||
| @Axel Wheeler: What we really need is a CreateGeosphere() code. Basically, what it does is create a sphere, but each face is a triangle, and all its vertices a evenly spaced. It would be perfect for this as it wouldn't cause distortions where there are more verts clumped together a the top and bottom poles of the sphere. @Malice: You're right, I guess that mult>0 line was sort of redundant because that would mean that the other vert's location would have to be the same as the selected one's. (.'. The distance=0) ..I still think the "Perlin Noise + 3D Array + Marching Cubes" method is worth a try, only I've never successfully created Perlin noise, and haven't the faintest idea how to use marching cubes. (Maybe someone here has?) |
| ||
| Clay: Yeah but it would be difficult to make that scalable. A d20 shape would be straightforward (don't try to tell me you don't know what a d20 is!), but how to make a command that takes a parameter to indicate how complex it should be? I couldn't find any general set of triangle-based polyhedra of increasing complexity. So you'd probably need a separate command for each polyhedron. A d20 would probably be small for this purpose...? Microsoft had a great paper on large triangle-based spherical meshes. I can't find it now. It may have worked by starting with a d20 shape and dividing each triangle into 4 new triangles (think about it), and bulging the vertices out to the correct radius, then recursively splitting the triangles further as needed. That should be doable. Hmm. Maybe I'll have a go tomorrow or so. No promises! Regarding deformations, I remember my method picked a random point in space around (or inside) the sphere. Then it pushed or pulled each vertex based on distance from that point. In other words it was similar to Clay Pidgeon's code but picking random points rather than limiting it to existing vertices. |
| ||
| The D20 shape (Regular Dodecahedron) - ands other regular solids) ought to be structured from a basic algorithm, same as there's a similar thing for regular polygons. I dunno what this might be,m though, but if I get the chance later, I'll ask my old friend Google and see what I can find. Biggest problem is, that we're dealing with tri's rather than various polygon shapes for the faces of the 3D shapes : Though working backwards from the angles might be a way to go (gonna be some tricky trig in there I see) Opposite to you, Axel, I've been playing with the Perlin noise (though honestly still don't fully understand what it's really doing), and the Marching Cubes thing is alien to me, definitely worth giving it a shot, if only at the very least to try out the other options :) |
| ||
| @Malice: Just to clear things up, Perlin noise is a method of generating smooth lumpy noise (as opposed to just purely random) while maintaining details on the small scale. The marching cubes algorithm is a method of extracting a solid mesh from a volume. (such as a fluid particles or a density grid) If a density grid (3D array) was created for the asteroids using perlin noise it might look pretty neat. Look here: Marching Cubes Terrain The terrain in the video is being rebuilt every frame in realtime, but it can be done once and stored in a mesh, as long as you don't need it to be destuctable or ever change. |
| ||
| Malice: The D20 is an icosahedron. The dodecahedron is the D12. Here is some code that makes an icosahedron and then subdivides it as many times as you want. Complexity ramps up fast! Keep the value small at first (like 4 or less) until you see how long it takes. Note that normals are wrong because adjacent triangles tend to be normalized the same and so are hard to see (I presume because there are way more triangles than vertices). Once you've textured it that should be less of a problem. The program uses vertex colors just to prove all the vertices and triangles are there. |
| ||
| Malice: The D20 is an icosahedron. The dodecahedron is the D12. Of course... silly me! >.<That's some neat code, you really have a good grip on this 3-D Mesh stuff, way better than I. Thanks too, ClayPidgeon I knew what Perlin Noise was 'for', just not how it really works! As for that Marchig Cubes stuff, thanks, that makes a lotta sense. The density grid approach is perhaps the most 'realistic' method to describing the asteroid belt! |
| ||
| Just want to share an update. Now the Saturn has nice procedural ice particle ring details and a shadow. No media required - everything is generated on the fly. One problem is that I don't know how to prevent the short flicker when I create the shadow texture. Any ideas? Another issue is the glow on the nightside, dunno how to darken this side of the glow mesh. Here some eye candy shots (again uncomment the milkyway and include the milkyway panorama from my signature to get the cool background, too). Use SHIFT or RMB for faster movement and LMB for 100x Zoom. I recommend to fly closer to the ring with turbo and continue moving without turbo when you are very close to it. The shadow, created out of two spheres, one distorted  Closeup of the ice particles  The shadow transition The ice particles, very much zoomed in  |
| ||
| Krischan, Now the planet obscures the near side of the ring (it was fine before). Then again, I have intel onboard video. Also, the shadow lines should be parallel, unless it has moved a lot closer to the sun than it is now... :-) Ring texture looks nice! The marching cubes algorithm seems to be based on an earlier marching squares algorithm. I found a nice description here: http://en.wikipedia.org/wiki/Marching_squares Then read the marching cubes article: http://en.wikipedia.org/wiki/Marching_cubes It all makes sense, but looks like a lot of work since you have to create 15 unique meshes, then create rotations and mirror images of these for a total of 256 meshes, then assign to each one a next direction to proceed after that pattern is applied. However, after doing all that you would be able to create a mesh out of a noise cloud. The actual construction of the mesh should be simple using sswift's AddMeshToSurface() function: http://www.blitzbasic.com/codearcs/codearcs.php?code=575 (the Blitz3D AddMesh() function adds a new surface each time as well, or at least it did. That would be weird in this case with so may surfaces, although I don't know what problems that would cause.) But the rest looks too complex for real use, but extremely cool to experiment with. Now I know how they do those pregnancy MRIs where you can see the baby's face. Whoa... :-) |
| ||
| For the record, I did read somewhere about a spherical terrain algorithm that involved random bisections of the sphere and puffing up one hemisphere while shrinking the other slightly. You then did this enough times and it all smoothed out. I tried it and it seemed very time consuming and just kind of strange, with the predictalbe fault lines running everywhere. The method I wrote picked a random point in space around or inside the asteroid (not a random vertex) and applied a linear push to each vertex based on distance (stronger push for nearer vertices as I recall). This code went missing although an older version of it may be around. If I find it I'll post it. (This was for a screensaver that is an updated starfield simulation; like the classic Windows screensaver but vastly updated. I have to set up my website so I can post it for y'all! Maybe I'll go do that now! |
| ||
Axel, the shadow is correct, take a look at this original Cassini picture here (and I don't think NASA moved Saturn closer to sun for this picture :-)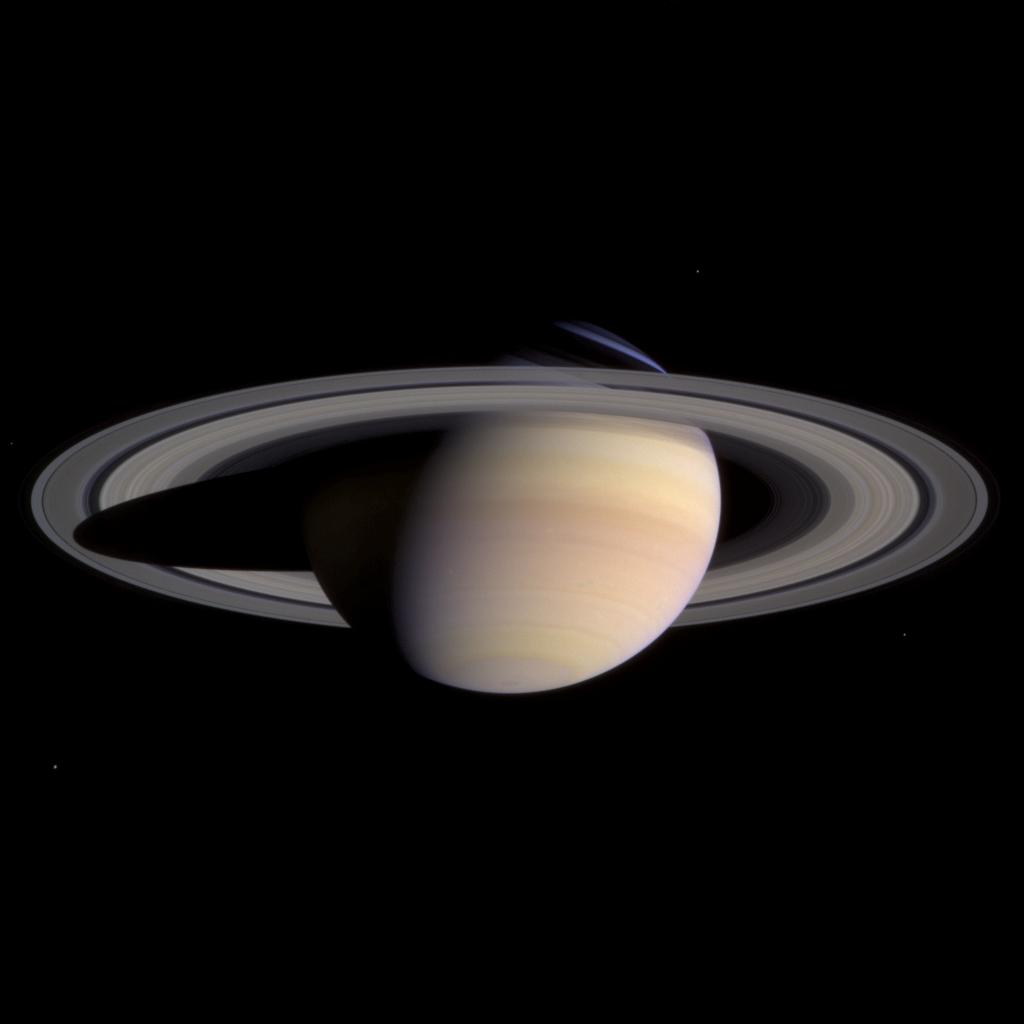 For the ring issue it could be the blendmode 3, just uncomment it in the function CreateSaturnRing -> ;EntityBlend RING,3, otherwise leave it and try this: change the line above it to EntityFX RING,1+2+16 (no +32). Without the blending it even looks more realistic as the stars behind the ring vanish when ice particle density gets too high. |
| ||
| For an unrealistic but parallel planet shadow just replace the "CreateSaturnShadow" call in the function "CreateSaturnRing" with this one: SHADOWTEX=CreateSaturnShadow(size,3,180,2,64,0.1,1000) and for a shadow matching the Cassini picture use SHADOWTEX=CreateSaturnShadow(size,3,180,2,64,24,8) Result  This stretches the second sphere much more without bending the edges too much - the last two values are important, width and length which are used in this line: VertexCoords surf1,v,x,y,z*Cos(z*width)*Sqr(z*length) |
| ||
| <embarassment mode> Oh, yeah. Planets are round, aren't they? I was thinking the disk is close to edge-on to the sun, which would produce nearly straight shadows. Hey, wait a minute... The sunlight hitting the planet should then be at the appropraite angle as well; is it? (as in the real photo you posted) Aha! Also, the ring leaves a shadow on the planet as well, but now I'm just being pedantic. :-) As to the EntityBlend fix; it worked fine, thanks. Georgeous work! |
| ||
| Shouldn't the shadow be tapered not bevelled? |
| ||
| Ok, so I wanted to fix my triangle subdivision code because I noticed it left lots of extra vertices in, but then I got carried away and put some more stuff in. Such as: Deform() deforms the mesh by moving each vertex randomly. Smooth() pulls each vertex back towards it's neighbors a bit. Try various combinations of the above two commands. Shows off the power of vertex colors to make a cool looking asteroid. Lets you dynamically set the complexity (0=icosahedron only, 1-5=number of subdivisions). You can go beyond 5 of course by editing the code, but I have no idea what will happen. 5 produces > 10,000 vertices and 20,000 triangles. Actually, the smaller ones look better in my opinion. About a 1 or 2 perhaps. They look rockier. |
| ||
@Rroff: I think it depends on the sun angle, see PIA06424 and this is very interesting PIA08361. I think it should only look cool even if it is not very realistic :-p @Axel: this is very usable, even with LOD. I suggest two improvements: - in the Function CreateAsteroid: thisGrey=grey+Rnd(-50,50)*Rnd(1) - add UV coordinates that a texture can be applied (cylindrical texture or detail) |
| ||
| That's nice too, Krischan - I had just cut 'Ellipse' (used 225 degrees instead of 360) so it had a gap facing away from the sun behind the planet to cheat to get the shadow effect, it's nowhere near as good as 'doing it properly'! Oh, yeah. Planets are round, aren't they? I was thinking the disk is close to edge-on to the sun, which would produce nearly straight shadows Saturn is most oblate of all the planets, around 10% difference between the circumference of the meridian and the equator. It has the lowest density, so the rings appear to "wobble" too, sincve they are equatorial to the planet, but the planet itself has an inclination of around 27 degrees to the orbital plane. The precession of the poles is about half a degree every 50 days or so. |
| ||
| Krischan: That looks awesome. I had experimented with the grey values, and somehow the light highlights didn't look good to me. ' As to UV coords; this is not designed around textures at all; but I'll check it out! |
| ||
| @Axel Wheeler: Your asteroid deformation code is quite nice. It appears pretty good for what we're aiming for. Nice work! |
| ||
[img] [/img] The real thing, in silhouette via Cassini. (Hope its size doesn't violate a rule...) Krischan; I just re-read the original post. Don't forget CopyEntity() which will greatly increase the number of asteroids you have on screen. And while all of the same one would be identical in shape, they could still differ greatly in size and texture (I think). I don't know about different vertex alpha for each copy; somehow I doubt it. So you could have 100 originals and 100 copies of each (or much more, depending on how simple they are.) Also of course they can rotate differently. |
| ||
| Awesome image! Going straight on my wallpaper. :) |
| ||
| By the way - today I found a nice video showing 30 years of asteroid discoveries, very stunning: Astounding Video Shows 30 Years of Asteroid Discoveries |
| ||
| That's an amazing video Krischan. Bookmarked. |
| ||
| Diddo. Favorited. |
| ||
| OK, I'll try to top the video, no comment, try it yourself. Again - everything is procedural. And Blitz3D only :-D Use arrows/mouse and SHIFT or RMB to speed up! Have a nice day at saturn.  |
| ||
| I think I see now what you wanted witht he asteroids - presumably to have the particles of the rings shown as the tiny rocks/ice that they are? I think this could be achieved, but maybe slow to cope with LOD changes. Only when the 'startfield' density is greater than 33% or so, and only when the camera is within so many units from the 'particles' might they be realised as roid-shaped meshes. Also, it may be a little pedantic, but 'realistically', the rings would be thicker when the camera is right up close (i.e. within the rings) although this is hard to convey since the scale of the planet/rings etc. doesn't match the viewport of the camera. Anyway, if I'm on the right lines regarding the asteroids, I'll see how I get on :) |
| ||
| Malice, this is only a demo of the dust particles, the texture here used is very simple just to show the effect. You could use the same "system" with two or three different types of objects, quads with a better texture for dust and far away particles, ultra lowpoly asteroids and nearby more detailed asteroids, all mixed up (I think in Freelancer you can see that it is mixed but still looks cool). Here, the system is built in my saturn demo but when you take a look at my code archive entry you can spawn particle fields where you want with a given / changing density. And this is what I wanted, saturn is only a part of it, look at the first post of this thread: possible: an asteroid belt like in our solar system (like a torus) possible: ice rings around planets (like a flat disc around saturn) possible: local asteroid/debris clouds (like a distorted sphere) possible: and the asteroids should be solid, moving, turning I am not sure how "thick" the rings must be to match reality - I am happy when it looks cool enough that it COULD be realistic even if it is far away from that :-D OK - my saturn has a scale of 100 blitz units and the ring from ca. 100 to 300. According to wikipedia the rings are only a few meters (!) thick, varying across distance from the planet. Saturn has a radius of 60.000km, if we assume the ring has a thickness of 100 meters (0,1km) it should have a vertical size of 0.000166 blitz units, so my ring is 12000 times too thick (0,1*100/60000 compared to -1 to 1 = 2 units) :-) But i doubt that the real ring is 100 meters think, rather 10-30 meters. The only open question is how to improve the speed of the particle creation... It is fast but not perfect. |
| ||
| > Going straight on my wallpaper. :) You should take a look at these wallpapers if you love space scenes: Wallpapers Room Deviant Art: Casperium Deviant Art: taenaron My favourite, Denebola:  |
| ||
| Not much else really comes to mind how to speed up the UpdateStarfield function, though I tried adding an extra Type field "scaled" as a boolean that was checked for and set once the particles were scaled, though it made little visible difference, since the check itself would have possibly countered any speed increase from not repeating the scaling. All I can think of to suggest is perhaps: 1) A collision check with the RING to hide it from view when 'right within it', so only the particles would be visible (I tried a quick version relying on the distance and density but really needs to be a collision to avoid flicker at some places) 2) A separate function to populate (and scale/ position) INITIAL starfield, rather than just the values for the fields, buit actually generate the quads as part of the procedurala setup. Then the first run of the update would ensure all is hidden/shown as required. This prevents the need to re-scale each loop. Overall, it's exceedingly fast, the only effects on the rendering speed I've really observed are when first "entering the rings" (i.e. making the particles visible for the first time) WHEN THE PLANET is in view too. This is clearly down to the number of poly's being rendered: Planet Mesh (+ Glow and shader etc) ~ 35 000 Ring Mesh ~1000 Particles at most dense ~1000 So you can see how the planet ramps up the poly count. The particles themselves are extremely fast so I dont think there's much can be done with them... Here's what I have tried to speed up things a little: |
| ||
| Malice, your particles flicker because of the scale check. Oh and use a {codebox}, you should edit your post... Meanwhile I've been able to boost the performance by ca. 100% with a simple trick, I think you can hardly notice the difference (beside that there are a lot more particles in the "air" now). In this stress test I spawn 50.000 particles (vs. 10.000) and approx. 10.000 are shown at 100% - 1.000 "real" particles are added to the single surface mesh and 9.000 fake particles added as single pixels to a sprite texture. This sprite is always in front of the cam and simulates the far away particles (the quads there scale about 1 pixel on the screen so I had the idea to use pixels on a texture instead of adding them to a mesh, saving calculation/render time). The transition is nearly seamless, see yourself: Full scene, ca. 10.000 objects, 90% pixel particles Press "4" to show/hide the sprite, here without pixel particles EDIT: there are two additional speed improvement in UpdateStarfield(): d=Distance3D(cx,cy,cz,s\x,s\y,s\z) is faster than Entitydistance and TFormPoint s\x,s\y,s\z,0,CAM : If TFormedZ()>0 Then is faster then EntityInView() And the ring transition between ICETEX1-3 and the particles has been optimized to fade more seamless and match the size. |
| ||
| Very impressive code (;-) |
| ||
| d=Distance3D(cx,cy,cz,s\x,s\y,s\z) is faster than Entitydistance and TFormPoint s\x,s\y,s\z,0,CAM : If TFormedZ()>0 Then is faster then EntityInView() That's really interesting to know. Presumably faster because the maths is being processed by the CPU rather than GPU when done this way, Or maybe some internal bottleneck with the compiling of the b3D commands/DX 7? You really have done wonders with this code, Krischan :) Edit: Just noticed the "sprite" is still rendered even when far awaay from the ring, or even facing away from it, is this worth even hiding or is it not gonna make enough of a difference? |
| ||
| Hi There, at first: I Love the procedural Saturn Demo ! i've added a little Texture to the Ring Have Fun AppTitle "Procedural Saturn 3.0 a" Graphics3D 1024,768,32,2 Dim P%(512),GRAYD#(512),HeightMap#(0,0),NoiseMap#(0,0) Global minh#=2^16,Maxh# Global density%[1024],ringcolor%[1024] Global quadparticles%,spritetex%,spritebuf%,pixelparticles% Type star Field col% Field scale# Field x#,y#,z# Field visible% End Type Const SCALEX# = 2.00 ; starfield scale X Const SCALEY# = 0.25 ; starfield scale Y Const SCALEZ# = 2.00 ; starfield scale Z Const MAXSTARS% = 50000 ; maximum asteroids Const TurnSpeed# = 4.00 ; cam turn speed Const RollSpeed# = 0.50 ; cam roll speed Const CameraSpeed# = 0.01 ; cam move speed Const SEED_PLANET1% = 8 ; seed for procedural planet texture Const SEED_PLANET2% = 8 ; seed for procedural planet texture Const SEED_RING1% = 6 ; seed for procedural ring texture Const SEED_RING2% = 6 ; seed for procedural ring texture Const SCALE# = 100.0 ; planet scale Const SEGMENTS% = 32 ; sphere detail Const RINGDETAIL% = 360 ; ring segments Const GLOWSEGMENTS% = 360 ; glow segments Const MINRINGRAD# = 0.7 ; minimum ring radius Const MAXRINGRAD# = 3.0 ; maximum ring radius Const PR% = 255 ; planet colors RED Const PG% = 192 ; planet colors GREEN Const PB% = 128 ; planet colors BLUE Global WIDTH%=GraphicsWidth() Global HEIGHT%=GraphicsHeight() Global TIMER%=CreateTimer(60) Global CAM%,PLANET%,PLANETTEX%,RING%,LIGHT,GLOW%,SHADER% Global RINGTEX%,ICETEX1%,ICETEX2%,ICETEX3%,SHADOWTEX% InitNoise(1.0) ; Planet PLANET=CreateSphere(SEGMENTS) ScaleEntity PLANET,SCALE,SCALE,SCALE EntityShininess PLANET,0.1 EntityFX PLANET,2 UpdateVertexColors(PLANET,PR,PG,PB,1) PLANETTEX=CreateRingTexture(256,SEED_PLANET1,SEED_PLANET2,1,False,"soft",1.0,1.0) TextureBlend PLANETTEX,2 RotateTexture PLANETTEX,90 EntityTexture PLANET,PLANETTEX ; Planet Atmosphere GLOW=CreateGlow(0.99*SCALE,1.1*SCALE,GLOWSEGMENTS,1+2+32,3,PR,PG,PB,0.5,0,0,0,0) ; Planet Fake Shader SHADER=CreateFakeShader(SEGMENTS,SCALE,PR,PG,PB,0.6) ; Ring System CreateSaturnRing(512,50000,1+8,"normal","normal",0.95,0.75,"perlin") ; Light source LIGHT=CreateLight(1) RotateEntity LIGHT,0,-90,0 AmbientLight 0,0,0 ; Camera CAM=CreateCamera() CameraRange CAM,0.0001*SCALE,1000*SCALE MoveEntity CAM,-1*SCALE,1.0/64*SCALE,-2*SCALE PointEntity CAM,PLANET ; star quad Global star=CreateQuad() HideEntity star ; starfield mesh Global starfield=CreateMesh() ;ScaleEntity starfield,Rnd(.5,3),Rnd(.5,3),Rnd(.5,3) Global surf=CreateSurface(starfield) EntityTexture starfield,CreateStarTexture(256,3) ;Starset EntityFX starfield,1+2+32 EntityBlend starfield,4 EntityOrder starfield,-1 ; fill star field AddStars(MAXSTARS,0.005,0.01) ; static camera sprite (far away particles) Global sprite=CreateSprite(CAM) ScaleSprite sprite,WIDTH,HEIGHT PositionEntity sprite,0,0,WIDTH EntityColor sprite,255,155, 55 EntityBlend sprite,3 EntityOrder sprite,-1 ; Milkyway background ;Include "milkyway.bb" : Global MILKYWAY%=InitMilkyway(5000,0.5,5,90,1,0,0,0,1,255,192,255,1,0,0,0,1) MoveMouse WIDTH/2,HEIGHT/2 ;=========================================================================== ; main loop ;=========================================================================== While Not KeyHit(1) Local multi%=1,l#=5.0,wf%,sl1%,sl2%,sl3%,sl4%,zoom#=1.0,d#,tmp%,ds%,dc% ; SHIFT or RMB = 50x faster cam flight If KeyDown(42) Or KeyDown(54) Or MouseDown(2) Then multi=50 ; SPACE = Wireframe If KeyHit(57) Then wf=1-wf : WireFrame wf ; KEYS 1-4 = show/hide special planet FX If KeyHit(2) Then sl1=1-sl1 : If sl1=1 Then HideEntity RING Else ShowEntity RING If KeyHit(3) Then sl2=1-sl2 : If sl2=1 Then HideEntity GLOW Else ShowEntity GLOW If KeyHit(4) Then sl3=1-sl3 : If sl3=1 Then HideEntity SHADER Else ShowEntity SHADER If KeyHit(5) Then sl4=1-sl4 : If sl4=1 Then HideEntity sprite Else ShowEntity sprite ; LMB = Ultra Zoom 100x If MouseDown(1) Then zoom=100.0 : l=500.0 ; camera movement Movement(CAM) CameraZoom CAM,zoom If MILKYWAY Then PositionEntity MILKYWAY,EntityX(CAM),EntityY(CAM),EntityZ(CAM) ; update atmosphere glow according to camera UpdateGlow(GLOW,CAM) ; calc ring density d#=EntityDistance(CAM,PLANET) If d>SCALE*MINRINGRAD And d<SCALE*MAXRINGRAD Then tmp=Normalize(d,SCALE*MINRINGRAD,SCALE*MAXRINGRAD,0,512) ds=Int(density[tmp]) dc=Int(ringcolor[tmp]) EndIf ; update asteroids UpdateStarfield(CAM,2,1,ds,dc) ; Update Saturn Ring Alpha UpdateVertexColors(RING,255,255,255,1.0-(1.0/Exp(Abs(EntityY(CAM)*0.5)))) RenderWorld WaitTimer TIMER ; show some stats in the app title AppTitle quadparticles+" Quads [and "+pixelparticles+" Pixel Particles] | "+(ds/2.55)+"% RING density | "+TrisRendered()+" Tris" Flip 0 Wend End ; ----------------------------------------------------------------------------- ; simple spaceship freeflight ; ----------------------------------------------------------------------------- Function Movement(cam%,sensitivity#=1.0) Local roll#,cz#,tx#,ty#,multi%=1 cz=(KeyDown(200)-KeyDown(208))*CameraSpeed roll=(KeyDown(203)-KeyDown(205))*RollSpeed If KeyDown(42) Or KeyDown(54) Or MouseDown(2) Then multi=25 tx=Normalize(MouseX(),0,WIDTH , 1,-1) ty=Normalize(MouseY(),0,HEIGHT,-1, 1) If ty<0 Then ty=(Abs(ty)^sensitivity)*-1 Else ty=ty^sensitivity If tx<0 Then tx=(Abs(tx)^sensitivity)*-1 Else tx=tx^sensitivity TurnEntity cam,ty*TurnSpeed,tx*TurnSpeed,roll*TurnSpeed MoveEntity cam,0,0,cz*multi End Function ; ----------------------------------------------------------------------------- ; create a quad ; ----------------------------------------------------------------------------- Function CreateQuad(r%=255,g%=255,b%=255,a#=1.0) Local mesh%,surf%,v1%,v2%,v3%,v4% mesh=CreateMesh() surf=CreateSurface(mesh) v1=AddVertex(surf,-1,1,0,1,0) v2=AddVertex(surf,1,1,0,0,0) v3=AddVertex(surf,-1,-1,0,1,1) v4=AddVertex(surf,1,-1,0,0,1) VertexColor surf,v1,r,g,b,a VertexColor surf,v3,r,g,b,a VertexColor surf,v2,r,g,b,a VertexColor surf,v4,r,g,b,a AddTriangle(surf,0,1,2) AddTriangle(surf,3,2,1) FlipMesh mesh Return mesh End Function ; ----------------------------------------------------------------------------- ; rebuild starfield mesh ; ----------------------------------------------------------------------------- Function UpdateStarfield(parent%,maxdist#=2.0,fader%=False,ds%,dc%) Local s.star,px#,py#,pz#,d#,a#,rgb%,col%,x%,y%,movecheck% Local cx#=EntityX(parent) Local cy#=EntityY(parent) Local cz#=EntityZ(parent) Local density%=Int(ds/2.55) ClearSurface(surf) quadparticles=0 pixelparticles=0 ; delete and create a new texture, acutally faster than clearing it If spritetex Then FreeTexture spritetex spritetex=CreateTexture(512,512,1) spritebuf=TextureBuffer(spritetex) EntityTexture sprite,spritetex LockBuffer spritebuf For s.star = Each star movecheck=False ; calc star position px=cx-s\x py=cy-s\y pz=cz-s\z ; check if star must be moved If px<-SCALEX Then s\x=s\x-(SCALEX Shl 1) : movecheck=True If px>+SCALEX Then s\x=s\x+(SCALEX Shl 1) : movecheck=True If pz<-SCALEZ Then s\z=s\z-(SCALEZ Shl 1) : movecheck=True If pz>+SCALEZ Then s\z=s\z+(SCALEZ Shl 1) : movecheck=True If movecheck Then s\visible=(Rand(100)<density) If s\visible Then ; reposition star PositionEntity star,s\x,s\y,s\z ; get distance d=Distance3D(cx,cy,cz,s\x,s\y,s\z) ; check if not to far away If d<maxdist TFormPoint s\x,s\y,s\z,0,CAM ; star is visible (in front of cam)? If TFormedZ()>0 Then ; fade pixel particles col=255 If fader Then col=Int(Normalize(d,0,maxdist,dc,0)) If col<0 Then col=0 Else If col>dc Then col=dc EndIf rgb=col*$10000+col*$100+col ; calculate pixel particle 2D position CameraProject CAM,s\x,s\y,s\z x=Normalize(ProjectedX(),0,WIDTH-1,0,511) y=Normalize(ProjectedY(),0,HEIGHT-1,0,511) ; pixel inside texture range? draw to texture! If x>0 And x<511 And y>0 And y<511 Then WritePixelFast x,y,rgb,spritebuf pixelparticles=pixelparticles+1 EndIf ; distance close enough to cam? spawn quad particle and add it to mesh If d<maxdist*0.25 Then ; align star to cam PointEntity star,CAM ScaleEntity star,s\scale,s\scale,s\scale ; add alpha a=1.0 : If fader Then a=Normalize(d,0,maxdist*0.25,1,0) ; add star To starfield again AddMeshToSurface(star,surf,starfield,s\col,s\col,s\col,a) quadparticles=quadparticles+1 EndIf EndIf EndIf EndIf Next UnlockBuffer spritebuf Return density End Function ; ----------------------------------------------------------------------------- ; add a mesh to another mesh ; ----------------------------------------------------------------------------- Function AddMeshToSurface(mesh,surf,singlesurfaceentity,r%,g%,b%,a#) Local vert%[2],vr%[2],vg%[2],vb%[2],va#[2],nx#[2],ny#[2],nz#[2] Local surface%,oldvert%,i%,i2% surface = GetSurface(mesh,1) For i = 0 To CountTriangles(surface)-1 For i2 = 0 To 2 oldvert = TriangleVertex(surface,i,i2) vr[i2]=r vg[i2]=g vb[i2]=b va[i2]=a nx[i2]=VertexNX(surface,oldvert) ny[i2]=VertexNY(surface,oldvert) nz[i2]=VertexNZ(surface,oldvert) TFormPoint VertexX(surface,oldvert),VertexY(surface,oldvert),VertexZ(surface,oldvert), mesh,singlesurfaceentity vert[i2] = AddVertex(surf,TFormedX(),TFormedY(),TFormedZ(),VertexU(surface,oldvert),VertexV(surface,oldvert)) VertexNormal surf,vert[i2],nx[i2],ny[i2],nz[i2] VertexColor surf,vert[i2],r,g,b,a Next AddTriangle(surf,vert[0],vert[1],vert[2]) Next End Function ; ----------------------------------------------------------------------------- ; add stars to starfield mesh ; ----------------------------------------------------------------------------- Function AddStars(amount%=1,min#=0.01,max#=0.02,addx#=0.0,addy#=0.0,addz#=0.0) Local i%,s.star Local density%=Normalize(Perlin3D(0,0,0,16,1,0,3),-1,1,0,100) If density<0 Then density=0 Else If density>100 Then density=100 For i=1 To amount s.star = New star s\col=Rand(64,255) s\x=addx+Rnd(-SCALEX,SCALEX) s\y=addy+Rnd(Rnd(Rnd(Rnd(-SCALEY))),Rnd(Rnd(Rnd(SCALEY)))) s\z=addz+Rnd(-SCALEZ,SCALEZ) s\scale=Rnd(min,max) If Rand(100)<density Then s\visible=True Next End Function ; ----------------------------------------------------------------------------- ; simple 3D distance calculation ; ----------------------------------------------------------------------------- Function Distance3D#(x1#,y1#,z1#,x2#,y2#,z2#) Local x#=x1-x2 Local y#=y1-y2 Local z#=z1-z2 Return Sqr((x*x)+(y*y)+(z*z)) End Function ; ----------------------------------------------------------------------------- ; create a simple star texture ; ----------------------------------------------------------------------------- Function CreateStarTexture(size%=256,flags%=3) Local tex%=CreateTexture(size,size,4) Local tb%=TextureBuffer(tex) SetBuffer tb ;LockBuffer tb asdu=8000 For as= 1 To asdu dur=Rnd(50) Color 170+dur,120,30 Oval 128+Rnd(-50,50),128+Rnd(-50,50),Rnd(10),Rnd(10),1;Rnd(0,1) Next Color 0,0,0 wx=Rnd(-20,20):wy=Rnd(-20,20) For w = 360 To 100 Step -1 Oval 128-(w/2),128-(w/2),w-.5+wx,w-.5+wy,0 Oval 128-(w/2),128-(w/2),w+wx,w+wy,0 Oval 128-(w/2),128-(w/2),w+.5+wx,w+.5+wy,0 Next For schx =0 To 255 For schy =0 To 255 GetColor schx,schy If ColorRed()=0 And ColorGreen()=0 And ColorBlue()=0 Then RGB1=ReadPixelFast(schx,schy,argb) ;r=(RGB1 And $FF0000)Shr 16;separate out the red ;g=(RGB1 And $FF00) Shr 8;green ;b=RGB1 And $FF;and blue parts of the color ;a=(RGB1 And $FF000000)Shr 24 a=0;add alpha 255; remove any alpha information currently in the texture. newrgb= (a Shl 24) Or (r Shl 16) Or (g Shl 8) Or b; combine the ARGB back into a number WritePixelFast(schx,schy,newrgb); write the info back to the texture Else zc#=zc+.012 rs=ColorRed() If rs>zc Then rs=rs -zc*1.5 gs= ColorGreen() If gs>zc Then gs=gs-zc*1.2 bs= ColorBlue() If bs>zc Then bs=bs-zc Color rs+Rnd(-5,5),gs+Rnd(-5,5),bs Plot schx,schy EndIf Next Next ;UnlockBuffer tb SetBuffer BackBuffer() Return tex End Function ; ----------------------------------------------------------------------------- ; create a simple star texture ; ----------------------------------------------------------------------------- Function CreateStoneTexture(size%=256,flags%=3) Local tex%=CreateTexture(size,size,flags) Local tb%=TextureBuffer(tex) Local i#,j%,col%,rgb% SetBuffer tb LockBuffer tb For j=0 To 255 col=255-j If col>255 Then col=255 rgb=col*$1000000+col*$10000+col*$100+col For i=0 To 360 Step 0.1 WritePixelFast (size/2)+(Sin(i)*(j*size/512)),(size/2)+(Cos(i)*(j*size/512)),rgb,tb Next Next UnlockBuffer tb SetBuffer BackBuffer() Return tex End Function ;=========================================================================== ; create procedural ring detail textures using perlin functions ;=========================================================================== Function CreateProceduralRingTextures(brightness1%=192,brightness2%=160,brightness3%=128,size%,detail%,flags%,noisetype$="perlin") Local buffer1%,buffer2%,buffer3% Local x%,y%,rgb%,rgb1%,rgb2%,col%,r%,i% If noisetype="fast" Then Dim HeightMap(size,size) Dim NoiseMap(size+1,size+1) FastNoise(size,8,1.2,1) EndIf ICETEX1=CreateTexture(size,size,flags) ICETEX2=CreateTexture(size,size,flags) ICETEX3=CreateTexture(size,size,flags) buffer1=TextureBuffer(ICETEX1) buffer2=TextureBuffer(ICETEX2) buffer3=TextureBuffer(ICETEX3) LockBuffer buffer1 LockBuffer buffer2 LockBuffer buffer3 For x=0 To size-1 For y=0 To size-1 rgb1=brightness1*$10000+brightness1*$100+brightness1 rgb2=brightness2*$10000+brightness2*$100+brightness2 WritePixelFast x,y,rgb1,buffer1 WritePixelFast x,y,rgb2,buffer2 Next Next For i=1 To detail ; random position x=Rand(0,size-1) y=Rand(0,size-1) ; random randomized randomizer r=Rand(0,Rand(0,Rand(0,255))) ; perlin or fast noise If noisetype="fast" Then col=Normalize(HeightMap(x,0),minh,Maxh,brightness1,255) Else col=Normalize(Perlin3D(x,0,y,4,1,0,15),-1,1,brightness1,255) EndIf col=Normalize(col+r,brightness1,511,brightness2,255) ; layer 1+2: identical perlin noise mixed with random rgb=col*$10000+col*$100+col WritePixelFast x,y,rgb,buffer1 WritePixelFast x,y,rgb,buffer2 ; layer 3: starfield like If noisetype="fast" Then col=Normalize(HeightMap(y,x),minh,Maxh,0,128) Else col=Normalize(Perlin3D(x,y,0,16,1,0,7),-1,1,0,128) EndIf col=Normalize(col+r,0,511,brightness3,255) If col<brightness3 Then col=brightness3 rgb=col*$10000+col*$100+col WritePixelFast x,y,rgb,buffer3 Next UnlockBuffer buffer3 UnlockBuffer buffer2 UnlockBuffer buffer1 End Function ;=========================================================================== ; main call to create the saturn ring system ;=========================================================================== Function CreateSaturnRing(size%=512,detail%=50000,flags%=1+8,mode$="normal",style$="cassini",fading#=0.85,range#=0.7,noisetype$="perlin") Local v%,surf% ; create procedural ring textures (ICETEX1-3) CreateProceduralRingTextures(160,192,0,size,detail,flags,noisetype) ; create shadow texture If style="cassini" Then SHADOWTEX=CreateSaturnShadow(size,3.3,180,2,64,24,8) Else If style="linear" Then SHADOWTEX=CreateSaturnShadow(size,3.3,180,2,64,0,100) Else SHADOWTEX=CreateSaturnShadow(size,3.3,180,2,64,24,16) EndIf ; create main ring texture RINGTEX=CreateRingTexture(size,SEED_RING1,SEED_RING2,3,True,mode,fading,range) ; create planetary ring RING=CreateMesh(PLANET) EntityFX RING,1+2+16+32 ;EntityBlend RING,3 surf=CreateSurface(RING) UpdateSaturnRing(RING,surf,MINRINGRAD,MAXRINGRAD,RINGDETAIL,255,255,255,255,255,255,1.0,1.0) ; init second UV set For v=0 To CountVertices(surf)-1 VertexTexCoords surf,v,VertexX(surf,v),VertexY(surf,v),0,1 Next ; reposition shadow texture PositionTexture SHADOWTEX,0.5,0.5 ; user second UV set TextureCoords ICETEX1,1 TextureCoords ICETEX2,1 TextureCoords ICETEX3,1 TextureCoords SHADOWTEX,1 ; scale textures ScaleTexture ICETEX1,1.0/128,1.0/128 ScaleTexture ICETEX2,1.0/64,1.0/64 ScaleTexture ICETEX3,1.0/32,1.0/32 ScaleTexture SHADOWTEX,6,6 ; apply to mesh EntityTexture RING,RINGTEX,0,1 EntityTexture RING,ICETEX1,0,2 EntityTexture RING,ICETEX2,0,3 EntityTexture RING,ICETEX3,0,4 EntityTexture RING,SHADOWTEX,0,5 ; blend details TextureBlend ICETEX1,3 TextureBlend ICETEX3,3 ; rotate ring RotateMesh RING,-90,90,0 End Function ;=========================================================================== ; create planetary ring mesh ;=========================================================================== Function UpdateSaturnRing(FMesh%,FFace%=1,FRadius1#=1.0,FRadius2#=3.0,FSegments%=120,FR1%=255,FG1%=255,FB1%=255,FR2%=255,FG2%=255,FB2%=255,FAlpha1#=1.0,FAlpha2#=1.0) If FSegments>360 Then FSegments=360 Local Angle% Local RV0%,RV1%,RV2%,RV3% Local RX0#,RX1#,RX2#,RX3# Local RY0#,RY1#,RY2#,RY3# Local SX0#,SX1#,SX2#,SX3# Local SY0#,SY1#,SY2#,SY3# Local U01#,U23# For Angle=1 To FSegments Step 1 RX0=Sin(Angle*360.0/FSegments)*FRadius1 RY0=Cos(Angle*360.0/FSegments)*FRadius1 RX1=Sin(Angle*360.0/FSegments -180.0/FSegments)*FRadius2 RY1=Cos(Angle*360.0/FSegments -180.0/FSegments)*FRadius2 RX2=Sin(Angle*360.0/FSegments +180.0/FSegments)*FRadius2 RY2=Cos(Angle*360.0/FSegments +180.0/FSegments)*FRadius2 RX3=Sin(Angle*360.0/FSegments +360.0/FSegments)*FRadius1 RY3=Cos(Angle*360.0/FSegments +360.0/FSegments)*FRadius1 SX0=RX0: SY0=RY0 SX1=RX0: SY1=RY0 SX2=RX3: SY2=RY3 SX3=RX3: SY3=RY3 U01=0 U23=0 RV0=AddVertex(FFace,RX0,RY0,0, U01,0) RV1=AddVertex(FFace,RX1,RY1,0, 1,0) RV2=AddVertex(FFace,RX2,RY2,0, 1,0) RV3=AddVertex(FFace,RX3,RY3,0, U23,0) VertexColor FFace,RV0,FR1,FG1,FB1,FAlpha1 VertexColor FFace,RV1,FR2,FG2,FB2,FAlpha2 VertexColor FFace,RV2,FR2,FG2,FB2,FAlpha2 VertexColor FFace,RV3,FR1,FG1,FB1,FAlpha1 AddTriangle FFace,RV0,RV1,RV2 AddTriangle FFace,RV2,RV3,RV0 Next Return FMesh End Function ;=========================================================================== ; creates the saturn shadow texture using two spheres, simple math and a cam ;=========================================================================== Function CreateSaturnShadow(size%=512,scale#=3.5,angle#=180.0,blur%=2,col%=64,width#=20.0,length#=9.0) Local sphere1%,sphere2%,tmp%,surf1%,surf2% Local v%,x#,y#,z#,tex%,add# sphere1=CreateSphere(32) EntityFX sphere1,1+2 sphere2=CreateSphere(32) EntityFX sphere2,1+2 surf1=GetSurface(sphere1,1) surf2=GetSurface(sphere2,1) For v=0 To CountVertices(surf1)-1 x#=VertexX(surf1,v) y#=VertexY(surf1,v) z#=VertexZ(surf1,v) If z>0 Then add=Sqr(z*length) Else add=1 VertexCoords surf1,v,x,y,z*Cos(width)*add VertexColor surf1,v,col,col,col VertexColor surf2,v,col,col,col Next tex=CreateTexture(size,size) tmp=CreateCamera() PositionEntity tmp,0,scale,0 CameraClsColor tmp,255,255,255 CameraViewport tmp,0,0,size,size PointEntity tmp,sphere1 RenderWorld FreeEntity sphere1 FreeEntity sphere2 FreeEntity tmp CopyRect 0,0,size,size,0,0,BackBuffer(),TextureBuffer(tex) If blur Then BlurTexture(tex,blur,blur) RotateTexture tex,angle Return tex End Function ;=========================================================================== ; blurs the saturn shadow texture for soft transitions ;=========================================================================== Function BlurTexture(Texture, Blur_Quality, Blur_Radius#) Local BlurMesh[16*4] Local Loop Local Blur_Cam Local BlurRadius#,BlurAngleStep#,BlurShade%,BlurAngle#,Xoff#,Yoff# Local BLUR_CAM_X# = 65536.0 Local BLUR_CAM_Y# = 65536.0 Local BLUR_CAM_Z# = 0.0 If Blur_Quality > 0 Blur_Cam = CreateCamera() CameraViewport Blur_Cam, 0, 0, TextureWidth(Texture), TextureHeight(Texture) CameraClsColor Blur_Cam, 0, 0, 0 CameraClsMode Blur_Cam, True, True CameraRange Blur_Cam, 0.1, 100 CameraZoom Blur_Cam, 16.0 RotateEntity Blur_Cam, 90, 0, 0, True PositionEntity Blur_Cam, BLUR_CAM_X#, BLUR_CAM_Y#, BLUR_CAM_Z# For Loop = 0 To (Blur_Quality*4)-1 BlurMesh[Loop] = CreateSprite() Next TextureBlend Texture, 2 ScaleTexture Texture, 0.5, 0.5 PositionTexture Texture, 0.5, 0.5 BlurRadius = Blur_Radius# * (1.0 / 256.0) BlurAngleStep = 360.0 / Float(Blur_Quality*4) BlurShade = Ceil(255.0 / Float(Blur_Quality*4)) For Loop = 0 To (Blur_Quality*4)-1 EntityTexture BlurMesh[Loop], Texture EntityFX BlurMesh[Loop], 1+8 EntityAlpha BlurMesh[Loop], 1.0 / Float(Loop+1) ScaleSprite BlurMesh[Loop], 2, 2 BlurAngle# = BlurAngleStep# * Float(Loop) + 180.0*(Loop Mod 2) Xoff# = BlurRadius# * Cos(BlurAngle#) Yoff# = BlurRadius# * Sin(BlurAngle#) PositionEntity BlurMesh[Loop], BLUR_CAM_X# + Xoff#, BLUR_CAM_Y# - 16.0, BLUR_CAM_Z# + Yoff#, True Next RenderWorld CopyRect 0, 0, TextureWidth(Texture), TextureHeight(Texture), 0, 0, BackBuffer(), TextureBuffer(Texture) For Loop = 0 To (Blur_Quality*4)-1 FreeEntity BlurMesh[Loop] Next FreeEntity Blur_Cam EndIf ScaleTexture Texture,1,1 PositionTexture Texture,0,0 End Function ;=========================================================================== ; updates the vertex colors of a mesh ;=========================================================================== Function UpdateVertexColors(mesh%,r%,g%,b%,a#) Local s%,surf%,v% For s=1 To CountSurfaces(mesh) surf=GetSurface(mesh,s) For v=0 To CountVertices(surf)-1 VertexColor surf,v,r,g,b,a Next Next End Function ;=========================================================================== ; creates a fake shader (spherical glow effect), should match planet size ;=========================================================================== Function CreateFakeShader(segments%=64,size#=1.0,r%=255,g%=224,b%=192,a#=0.5) Local shader%=CreateSphere(segments) Local tex%=CreateFakeShaderTexture() ScaleEntity shader,size,size,size EntityBlend shader,3 EntityFX shader,2 EntityOrder shader,-1 UpdateVertexColors(shader,r,g,b,a) TextureBlend tex,2 EntityTexture shader,tex,0,1 Return shader% End Function ;=========================================================================== ; creates fake shader texture ;=========================================================================== Function CreateFakeShaderTexture() Local tex%=CreateTexture(512,512,64) Local tb%=TextureBuffer(tex) Local x%,y%,i#,j%,col%,rgb% SetBuffer tb LockBuffer tb For x=0 To 511 For y=0 To 511 rgb=255*$1000000+255*$10000+255*$100+255 WritePixelFast x,y,rgb,tb Next Next For j=0 To 255 col=j*1.0/Exp((255-j)*0.02) If col>255 Then col=255 If col<0 Then col=0 rgb=col*$1000000+col*$10000+col*$100+col For i=0 To 360 Step 0.1 WritePixelFast 256+(Sin(i)*j),256+(Cos(i)*j),rgb,tb Next Next UnlockBuffer tb SetBuffer BackBuffer() Return tex End Function ;=========================================================================== ; create planet atmosphere ;=========================================================================== Function CreateGlow(radius1#=1.0,radius2#=2.0,segments%=360,fx%=0,blend%=0,r1%=255,g1%=255,b1%=255,al1#=0.0,r2%=0,g2%=0,b2%=0,al2#=1.0) Local a1#,a2#,a3#,a4#,angle%,v0%,v1%,v2%,v3% Local mesh=CreateMesh() Local surf=CreateSurface(mesh) If segments>360 Then segments=360 For angle=1 To segments a1=angle*360.0/segments a2=angle*360.0/segments +360.0/segments a3=angle*360.0/segments +180.0/segments a4=angle*360.0/segments -180.0/segments v0=AddVertex(surf,radius1*Cos(a1),radius1*Sin(a1),0,0,0) v1=AddVertex(surf,radius1*Cos(a2),radius1*Sin(a2),0,0,0) v2=AddVertex(surf,radius2*Cos(a3),radius2*Sin(a3),0,1,1) v3=AddVertex(surf,radius2*Cos(a4),radius2*Sin(a4),0,0,1) VertexColor surf,v0,r1,g1,b1,al1 VertexColor surf,v1,r1,g1,b1,al1 VertexColor surf,v2,r2,g2,b2,al2 VertexColor surf,v3,r2,g2,b2,al2 AddTriangle surf,v2,v1,v0 AddTriangle surf,v0,v3,v2 Next If fx>0 Then EntityFX mesh,fx If blend>0 Then EntityBlend mesh,blend Return mesh End Function ;=========================================================================== ; update planet atmosphere ;=========================================================================== Function UpdateGlow(mesh%,cam%) Local radius#,distance# Local c1#,a1#,q1#,p1#,h1#,alpha1#,beta1#,gamma1#,alpha2#,b2#,c2# PointEntity mesh,cam radius=SCALE distance=EntityDistance(cam,PLANET) ; First triangle c1=distance a1=radius q1=a1^2/c1 p1=c1-q1 h1=Sqr(p1*q1) gamma1=90 alpha1=ATan(h1/p1) beta1=gamma1-alpha1 ; Second Triangle alpha2=90-(90-beta1) b2=a1/Tan(alpha2) c2=(Sqr(a1^2+b2^2))/radius ScaleEntity mesh,c2,c2,c2 End Function ;=========================================================================== ; create planetary ring texture ;=========================================================================== Function CreateRingTexture(size%=1024,seed1%=1,seed2%=2,flags%=0,usealpha%=False,method$="normal",fading#=1.0,range#=0.7) Local tex%=CreateTexture(size,1,flags) Local buffer%=TextureBuffer(tex) Local x%,h1#,h2#,h3#,col%,alpha%,rgb%,value# LockBuffer buffer For x=0 To size-1 h1=Perlin3D(x*(2048/size),0,0,1024,seed1,0,15) h2=Perlin3D(0,x*(2048/size),0,512,seed2,0,7) col=Int(Normalize(h1,-range,range,0,255)) : If col<0 Then col=0 Else If col>255 Then col=255 If usealpha Then If method="soft" Then ; soft rings alpha=(Int(Normalize(h2,-range,range,0,1.5)*col)+Int(Normalize(h3,-1,1,0,1.5)*col))/2.0 Else If method="sharp" Then ; sharp rings alpha=Int(Normalize(h1,-range,range,0,1.0)*col)*Rnd(0.98,1.02) Else ; normal rings alpha=Int(Normalize(h2,-range,range,0,1.0)*col) EndIf If alpha<0 Then alpha=0 Else If alpha>255 Then alpha=255 Else alpha=255 EndIf ; soft fading to the outer rings If x>(size*fading) Then value=Normalize(x,size*fading,size,1,0) alpha=alpha*value col=col*value EndIf density[x]=alpha;(col+alpha)/2 ringcolor[x]=col rgb=alpha*$1000000+col*$10000+col*$100+col WritePixelFast x,0,rgb,buffer Next UnlockBuffer buffer Return tex End Function ;=========================================================================== ; normalize value ;=========================================================================== Function Normalize#(value#=128.0,value_min#=0.0,value_max#=255.0,norm_min#=0.0,norm_max#=1.0) Return ((value#-value_min#)/(value_max#-value_min#))*(norm_max#-norm_min#)+norm_min# End Function ;=========================================================================== ; fast perlin noise functions ;=========================================================================== Function InitNoise(range#=0.7) Local i%,perm% Restore permutation For i=0 To 256-1 Read perm P(i)=perm P(256+i)=perm GRAYD#(i)=Rnd(-range,range) GRAYD#(256+i)=Rnd(-range,range) Next End Function Function Perlin3D#(x#,y#,z#,size#=64,seed%=0,MinOctaves=0,MaxOctaves=9999) Local value#,initialSize#,i% If seed=0 Then seed=MilliSecs() x=x+seed y=y+seed z=z+seed value=0.0 initialSize=size For i = 1 To MinOctaves : size=size/2 : Next While(size>=1.0) And MaxOctaves>MinOctaves value=value+SmoothNoise(x/size,y/size,z/size,seed)*size size=size/2.0 MaxOctaves=MaxOctaves-1 Wend Return (value/Float(initialSize)) End Function Function SmoothNoise#(x#,y#,z#,seed%=0) Local x1#,y1#,z1#,u#,v#,w#,a#,aa#,ab#,b#,ba#,bb# Local g1#,g2#,g3#,g4#,g5#,g6#,g7#,g8# Local l1#,l2#,l3#,l4#,l5#,l6#,l7# x=x+seed y=y+seed z=z+seed x1=(Floor(x) And 255) y1=(Floor(y) And 255) z1=(Floor(z) And 255) x=x-Floor(x) y=y-Floor(y) z=z-Floor(z) u=Fade(x) v=Fade(y) w=Fade(z) a=P(x1)+y1 aa=P(a)+z1 ab=P(a+1)+z1 b=P(x1+1)+y1 ba=P(b)+z1 bb=P(b+1)+z1 g1=GRAYD(bb+1) g2=GRAYD(ab+1) g3=GRAYD(ba+1) g4=GRAYD(aa+1) g5=GRAYD(bb) g6=GRAYD(ab) g7=GRAYD(ba) g8=GRAYD(aa) l1=Lerp(u,g2,g1) l2=Lerp(u,g4,g3) l3=Lerp(v,l2,l1) l4=Lerp(u,g6,g5) l5=Lerp(u,g8,g7) l6=Lerp(v,l5,l4) l7=Lerp(w,l6,l3) Return l7 End Function Function Fade#(t#) Return t*t*t*(t*(t*6-15)+10) End Function Function Lerp#(t#,a#,b#) Return a+t*(b-a) End Function Function FastNoise(size%,Scale#,Multiplier#,wrap%=False) Local Max_Height#,NoiseMapSize%,ScaleDifference#,StepSize# Local N1#,N2#,N3#,N4#,HX#,HY#,IX#,IY#,ICX#,ICY#,NA#,NB#,NC#,ND# Local i%,x%,y%,xx%,yy% Local v# Max_Height=Scale For y=0 To size Step 1 For x=0 To size Step 1 HeightMap(x,y)=Rnd(0,1) Next Next NoiseMapSize=size/2 Max_Height=Max_Height*Multiplier Repeat For y=0 To NoiseMapSize For x=0 To NoiseMapSize NoiseMap(x,y)=Rnd(0,Max_Height#) Next Next If wrap Then For i=0 To NoiseMapSize : NoiseMap(i,0)=NoiseMap(i,NoiseMapSize) : Next For i=0 To NoiseMapSize : NoiseMap(0,i)=NoiseMap(NoiseMapSize,i) : Next EndIf ScaleDifference=size*1.0/NoiseMapSize StepSize=1.0/Float(ScaleDifference) For y=0 To NoiseMapSize-1 For x=0 To NoiseMapSize-1 N1=NoiseMap(x, y ) N2=NoiseMap(x+1,y ) N3=NoiseMap(x, y+1) N4=NoiseMap(x+1,y+1) HX=x*ScaleDifference HY=y*ScaleDifference IY=0 For yy=0 To ScaleDifference-1 ICY=1.0-((Cos(IY*180.0)+1.0)/2.0) IX=0 For xx=0 To ScaleDifference-1 ICX=1.0-((Cos(IX*180.0)+1.0)/2.0) NA=N1*(1.0-ICX) NB=N2*ICX NC=N3*(1.0-ICX) ND=N4*ICX v=HeightMap(HX+xx,HY+yy)+(NA+NB)*(1.0-ICY)+(NC+ND)*ICY If v>Maxh Then Maxh=v If v<minh Then minh=v HeightMap(HX+xx,HY+yy)=v IX=IX+StepSize Next IY=IY+StepSize Next Next Next NoiseMapSize=NoiseMapSize/2 Max_Height=Max_Height*Multiplier Until NoiseMapSize<=2 End Function .permutation Data 151,160,137,91,90,15 Data 131,13,201,95,96,53,194,233,7,225,140,36,103,30,69,142,8,99,37,240,21,10,23 Data 190, 6,148,247,120,234,75,0,26,197,62,94,252,219,203,117,35,11,32,57,177,33 Data 88,237,149,56,87,174,20,125,136,171,168, 68,175,74,165,71,134,139,48,27,166 Data 77,146,158,231,83,111,229,122,60,211,133,230,220,105,92,41,55,46,245,40,244 Data 102,143,54, 65,25,63,161, 1,216,80,73,209,76,132,187,208, 89,18,169,200,196 Data 135,130,116,188,159,86,164,100,109,198,173,186, 3,64,52,217,226,250,124,123 Data 5,202,38,147,118,126,255,82,85,212,207,206,59,227,47,16,58,17,182,189,28,42 Data 223,183,170,213,119,248,152, 2,44,154,163, 70,221,153,101,155,167, 43,172,9 Data 129,22,39,253, 19,98,108,110,79,113,224,232,178,185, 112,104,218,246,97,228 Data 251,34,242,193,238,210,144,12,191,179,162,241, 81,51,145,235,249,14,239,107 Data 49,192,214, 31,181,199,106,157,184, 84,204,176,115,121,50,45,127, 4,150,254 Data 138,236,205,93,222,114,67,29,24,72,243,141,128,195,78,66,215,61,156,180 |
| ||
| Well, I forgot to share an update I made a few weeks ago just for fun - I added animated and moving asteroids/rings using sprites for the asteroids with three different layers for variation. Could look even better if better textures are used. But looks now more realistic now in my opinion - closer to Freelancer :-D Here is the complete archive with all source and media ready to run: saturn.zip I added a Wallpaper Generator, too (I really love this Saturn) - if you want the clean scene as a Wallpaper just change the Graphics3D resolution to your Desktop size, run it and press Space. I created my Gallery Picture with it.  And here the new code (needs additional media from the zip): Last edited 2011 |
| ||
| Absolutely stunning... and stupendously fast! Even on a 2ghz PC relic. |
| ||
| Good code and optimized graphics can achieve a lot. Amazing work and thank you for sharing! |
| ||
| The feeling of seeing the creations of this man makes me feel and realize that I have much to believe that I am programmer ... : S (Frustrated) |
| ||
| @ Yue: Same here. :-) Was re-checking BlitzTiles 1.02 just now cos I missed that version when he released it. Unfortunately I found adding FastExtension(for shadows and more realistic water) gives a MAV in FastExt.bb on: Which is a pitty cos otherwise it might be really cool to use BlitzTiles and FastExt together. |
   |